Wednesday, November 18, 2015

The 10 Minute Cozy Poncho Tutorial


I see warm, drapey blanket ponchos everywhere I look these days!  They are just perfect for wearing on a hayride, sleigh-ride, or roasting marshmallows outside.  

As a sewing person I inspect clothing constantly to see how it's constructed.  It's a little embarrassing sometimes when I get a raised eyebrow from friends who haven't shopped with me before, or from fellow customers in a store.  My kids just tell them, "My mom is seeing how she can make that!"  Well, this one is just TOO easy not to share.  Grab a yard and a half or so of a beautifully printed, non-fraying fabric and you are literally 10-minutes away from finishing one of these!  If your fabric of choice needs to be hemmed to prevent fraying, make that 20-30 minutes tops.  For mine, I used fleece.  

STEP #1: MEASURE
This project is essentially just a rectangle. To get your size, take the following two measurements:
First, you will get your width measurement.  Have your child stand with both arms straight out, or you can lay a long-sleeved tee shirt flat on the floor with arms out.  Either way will work.  Measure from the point at about mid-forearm to the same point on the other arm.  Mine was 30 inches across.
Next, you need your length.  Measure from the top of the shoulder to about half-way between waist and knee. Mine was 24 inches.  Double that length as you'll be folding the poncho over front and back.

STEP #2: CUT
Lay out your fabric with the direction of stretch running horizontally and cut a rectangle using your length and width measurements.  
Now, find and mark the middle point of your rectangle.


STEP #3: FRONT SLIT
Cut a straight line from the mid-point of your bottom edge up to the middle point of the rectangle.  Toward the top of the slit, you may want to round out a narrow tear drop shape for a smoother neckline.  You can also use scissors to round the corners of desired.
If your fabric is prone to fraying, now is the time to sew a regular or rolled hem all the way around the cut edges.


 STEP #4: SIDE STITCHES
Fold your rectangle in half from top to bottom with wrong-sides-together, so that the slit is in front. Find the mid-point of the right and left edges.  Stitch a horizontal line about 2 inches long on both sides as shown.  This will form your arm opening.


STEP #5: CLOSURE
You may stop here if you'd like, or add a front closure.  I had two buttons and a hair elastic on hand; but a toggle, frog clasp, or button with button-hole would work well too! 

 If using an elastic loop closure, simply stitch down your elastic on one side, about halfway down the front slit.


 Attach buttons: one covering up the stitched-down end of your elastic, and one on the other side of the slit.  


 Voila!  You are finished:)  Just like that!
Send her out to enjoy the cool weather in her new Cozy Poncho.


I hope you enjoyed this free tutorial!  Check out the Ruby & Jack Pattern Shop on Etsy to find more fun projects to sew.


Saturday, October 24, 2015

NEW RELEASE! Playground to Palace Dress


Meet the new Playground to Palace Dress!
This gown is elegant enough for the ballroom AND as comfy as her favorite tee shirt...


The Playground to Palace is perfect for any costume, dress up occasion, or simple casual style.  Its secret is a fully-lined stretch bodice that makes for a fitted look, and easy self-dressing.  It's a quick sew with no fussy closures. Pattern options include a non-gathered or fuller gathered skirt that can be made short or long.  Instructions and measurements are given to add embellishments like a shoulder sash, cape, and skirt overlay.  Take a look at the beautiful creations our testers have stitched up, to inspire you!


I adore this soft and beautiful dress made by Ellie, and those precious little barefoot baby toes.
by Ellie K. from  Dearly Loved Photography


Amanda E. from Squishy Little Sunshine
was the Fairy Godmother behind this impressive Cinderella gown!


This is such a stunning Princess Aurora!
by Jessica R. from


Rachel D. made her little girl the most lovely Elsa dress, complete with a sparkly cape.  Her super powers clearly shine through in this picture!


Hanne W. sewed this cute and festive Halloween dress. 


Real princesses play outside.  And this dress is perfect for that:)
Merial A.'s little girl is having fun in hers!


Lore H.
made this beauty.


This picture of Sierra's little princess in her Cinderella dress makes me feel like I've stepped right into the fairy tale!
by Sierra H.


Abby Y. from  
created this adorable rosey version, perfect for an English tea party.


This lovely little lady is wearing a pink Aurora dress 
created by Tara J. of


Kelli H. made this fancy version with the most beautiful detail of lace color-blocking for the side pieces.


Jessica used the short length skirt and made these two spectacular rainbow fairies.


She also made this beautiful non-so-wicked witch dress with a glittery spider web overlay.


Lieve C. made this colorful, twirly knit princess play dress.


Lena D.'s princess look beautiful and happy in her apricot gown.


This picture is just magical.  She looks like a natural princess.
by Sara H.


This gorgeous dress is so elegant and sophisticated and shows off how versatile the pattern can be!
by Tone


I love the creativity is this awesome edgy version.
by Essence of


 Jennifer P. sewed a cute rainbow version for her sweetie.


Donna made this amazing Queen of Hearts dress!  I adore how all her creative details came together in this awesome costume.


Ashley
from Clayton and Hailey sewed up this pretty little number.


Kaitlyn H. made both of these gorgeous play dresses-a princess and a witch!


And have you ever seen anything cuter than this pink princess of Emily M's?


I am SO excited about all the possibilities in this pattern!  Grab a copy here, and share your own creations with us at Ruby & Jack Patterns on Facebook! 

Use coupon code HALLOWEEN25  for 25% off in the Ruby & Jack Etsy shop through October 31, 2015.

Monday, October 20, 2014

Unicorn Hoodie Tutorial and Free Pattern

Happy Fall!  Halloween is just around the corner, which means my girls and I have been busy lately, dreaming up plans and working on their costumes.  I always look so forward to this season, when I get to make them something magical that they've envisioned and helped me create.  Their costumes are unquestionably the favorites of all the items I sew for them each year.  I'm excited and honored to be a guest contributor at GYTC Designs today for the "31 Days of Halloween" Series!  Please follow the link above to check out my post.  I'm sharing a free tutorial and pattern template for this simple, but lovely Halloween costume for all your My Little Pony-loving girls.


Wednesday, August 27, 2014

Pattern Release! Upsized "April Showers Jacket"

I am excited to introduce today, the upsized version one of my favorites, the "April Showers Jacket."  Opening up shop last November, I offered this (toddler-sized) jacket as my very first pattern!  I've so enjoyed the positive customer response it's gotten, especially the requests to grade it into bigger sizes.  The new pattern includes sizes 12 mos.-10!  I've given it a general upgrade as well based on new tester feedback, including better measurement charts, an elastic option for the hood, and additional notation within the pattern pieces to help construction go even more smoothly! 


This simple little raincoat is fully lined and can be sewn for boys and girls. 
It's an easy sew and a great choice for a first jacket pattern, if you've never made one before.  Cotton laminate fabric is ideal for the project; and a full section of tips for using this type of material is given in the tutorial.  Your coat can also be made with a variety of fabrics such as corduroy, quilter's cotton, fleece, wool, nylon, PUL, etc.  Linings that work well include everything from flannel, to minky.   The design also gives you the ability to sew a completely reversible jacket if you wish.  The "April Showers Jacket" will be an awesome staple in your
 little (or big:) one's closet!

Here are a few of the beautiful coats created by my excellent testers:

by, Angela from Blog.thestone.org
 
                                                        by, Krissy at Totally Toostsies

                                               by, Gloria from Gloriajune44.blogspot.com

 
                                           by, Kylie at WWW.facbook.com/DribblePots

by, Kristel
 
                                                      
                                                                a cute reversible jacket
                                                                         by, Racheal


                                                                         by, Lieve

an adorable Fall coat in corduroy
by, Jennifer

                                                                            by, Mary
 
You may purchase your copy in my Etsy shop:
Use the coupon code LABORDAY14 today through September 1st for 30% off this or any of the patterns in the shop!

If you already own the original "April Showers Jacket" pattern, I have listed the new version just for you, as an add-on, for a minimal charge.  Simply select the "April Showers Add-On" listing at purchase.  I'll check records to verify that you have bought it previously, then email you the upgraded version. 
 (The coupon code LABORDAY14  works for the add-on as well!)

You can also enter to win a copy for FREE! 
(If you buy the pattern, then win, I'll be happy to refund your purchase price.)

                                                                a Rafflecopter giveaway

Thursday, June 26, 2014

Why I Sew

I love Sewing Mama RaeAnna's idea for this series!  Here's my story:

My passion for sewing probably began earlier than I can remember---on those precious afternoons I spent one-on-one with my Grandmother Ruby, who kept me as a preschooler while my mom was at work.  She loved sewing and had a closet full of supplies left over from her beautiful projects.  She gave me free reign over ALL of them!  It was a creative wonderland.  I recall her sitting with me, showing me how to stitch--first with a needle and thread--then propped up on a stack of telephone books at her sewing table.  After starting elementary school, I still spent mornings, afternoons, and breaks at her house.  I loved spending time drawing patterns for little doll clothes and stuffed animals.  She introduced me to different techniques whenever I would ask--but for the most part, she let me experiment independently.  I fell in love with the trial and error process of taking an intangible idea and forming it into an actual object.

It wasn't till I became an adult that I started wanting to make useful items:)  Many of my first "real" projects were baby gifts for friends as we starting having children.  They were FAR from perfect; as I still had a lot to learn. 


 In fact I'm still learning and hope never to stop!

One thing I've learned, is that our God is creative at his core.  He made us in his image and placed in us a little of his desire and ability to CREATE:).   As humans, we reflect Him imperfectly.  But I can't help but think that when we develop and use those gifts, however limited we may be--that it honors Him.


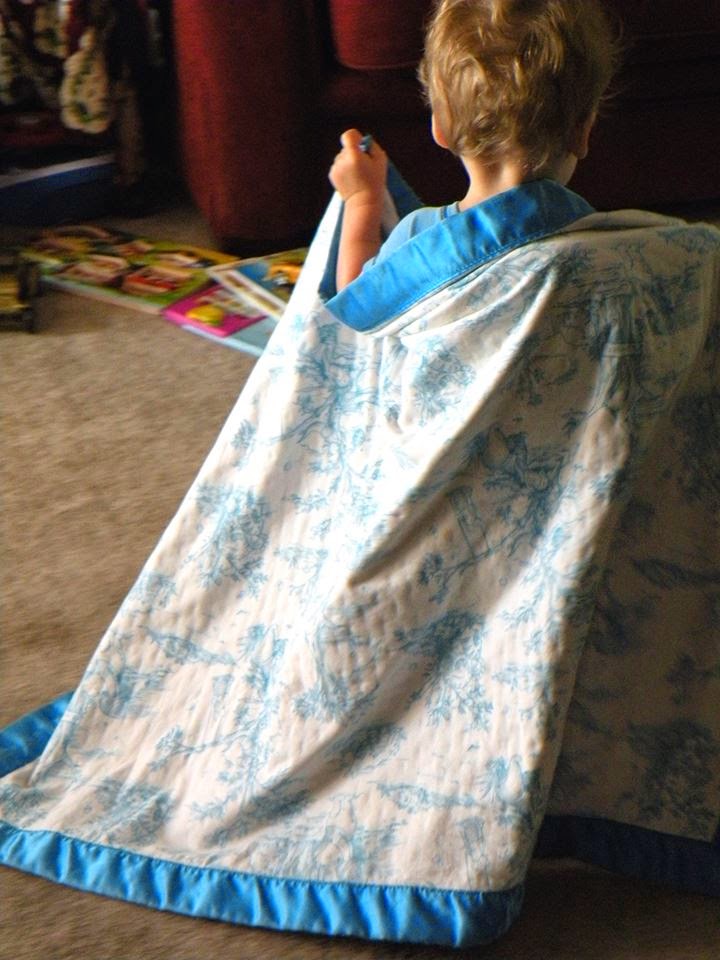
This blanket, was one of my first "grown-up" sewing projects.  I gave it to a sweet little newborn in 2007.  In 2012, his mom sent me a message. She asked if there was any way I could revive the blanket because it was completely threadbare and falling apart from use.  That little boy--no longer a baby---NEEDED it. 
It was THE blanket.  
As I sat with my seam ripper and that pitiful-looking quilt, picking out stitches I had sewn over 5 years before, I had never been so proud of something I'd made.  I remember thinking to myself, "THIS is why I sew."

Sewing had given me a way to show love.  A way of showing others they are important to me by sharing my time, thought, and energy---to make something just for them.  Not everything is treasured forever, no doubt.  Of course, plenty of items I sew have certainly made their way into Goodwill bags and hand-me-down boxes.  But that is perfectly okay too!  Sewing has accomplished it purpose as creative outlet for me, and expressing love to others.  Pretty satisfying and worthwhile!!

So--I keep on creating for family and friends, and designing patterns for my shop,
My sewing and designing time is limited though, as I do take frequent detours to teach and assist my kids with the spontaneous projects THEY just HAVE to make!  I love passing on this skill to them and fueling their creative fires:)


And I relish every single bit of it!


Everyone starts somewhere.  We all have different goals and reasons for being part of this craft.  That is the spirit behind the "Why I Sew" series.  I just love this online sewing community we have going! I'm thankful that it is, by and large, encouraging, inspiring, and positive!  Comment, link up, and share why you sew!  Check out other bloggers' stories here:


6.22.14 | Sewing Mama RaeAnna | Simple Simon and Co. |
6.23.14 | Boy Oh Boy Oh Boy | Nimble Phish | Sprouting Jube Jube | Paisley Roots | Made For Mermaids | Glitter and Wit | Peek-a-Boo Pattern Shop | Rae Gun Ramblings |
6.24.14 | Shaffer Sisters | Sew Like My Mom | Bebe Lambs | EYMM |
6.25.14 | The Sewing Geek | GYCT | Lulu and Celeste |
6.26.14 | Ruby and Jack Patterns | Muse of the Morning | Fishsticks Designs | Little Kids Grow |
6.27.14 | Make it Handmade | Rebel and Malice | Ali Cat & Co. |